
Everything in our life has a balance. Nature makes everything perfect; even when we think something wrong has happened, everything still maintains a balance. In my opinion, music is a part of nature, with many musical instruments crafted from wood, steel, and other elements found on our beautiful planet. As a rule, sound is also a component of nature that should contain a perfect balance.
Musical instruments are tuned to specific frequencies, ensuring harmony among all instruments in a duet, trio, band, or orchestra. This simple adjustment, called tuning, helps maintain balance in the ensemble.
Many people who have recently bought a guitar come home excited to find their first chord and make their first strum. However, their happiness quickly changes to frustration because their guitar often arrives untuned. If you share the same feeling, this article is exactly what you need. I will help you and explain everything so that your guitar stays tuned.
So, let's get started! If you're ready, grab a glass or cup of your favorite drink, and let's dive into this article about the most popular routine that every guitarist follows: How to Tune the Guitar.
First Things to Know
Before we start tuning the guitar, we should be familiar with the elements that help the guitar stay in tune. These are called tuning pegs, tuning machine heads, tuning keys, or simply tuners. Let’s look at the picture below. We can see different guitar headstocks with various designs of tuning systems, but their functionality remains the same: keeping the guitar in tune.

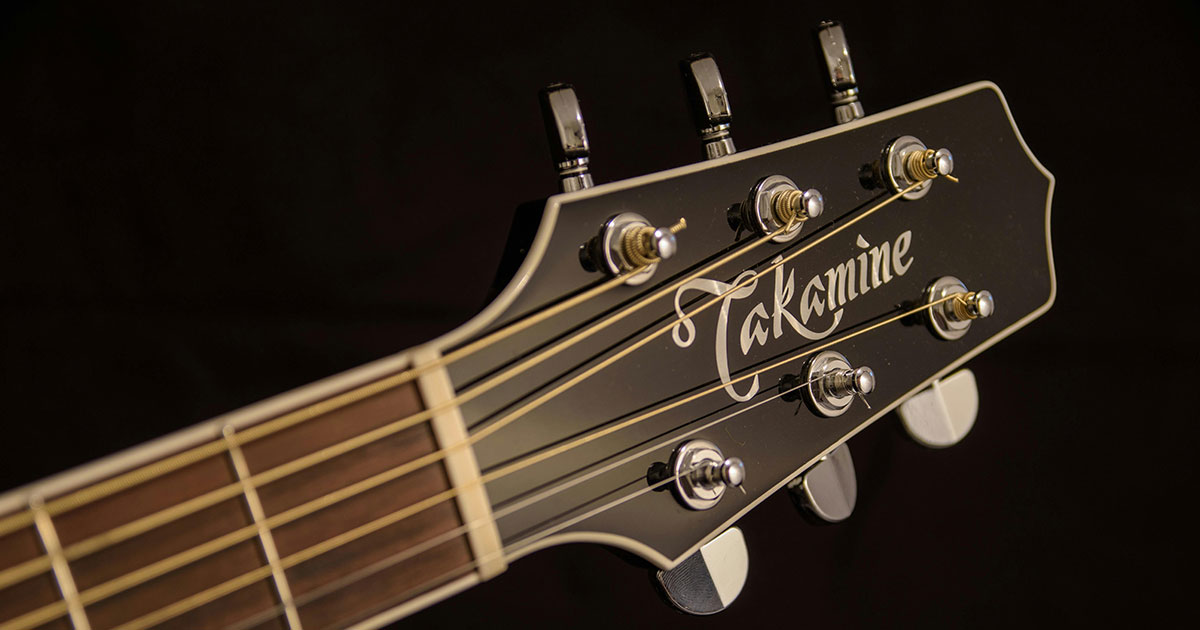

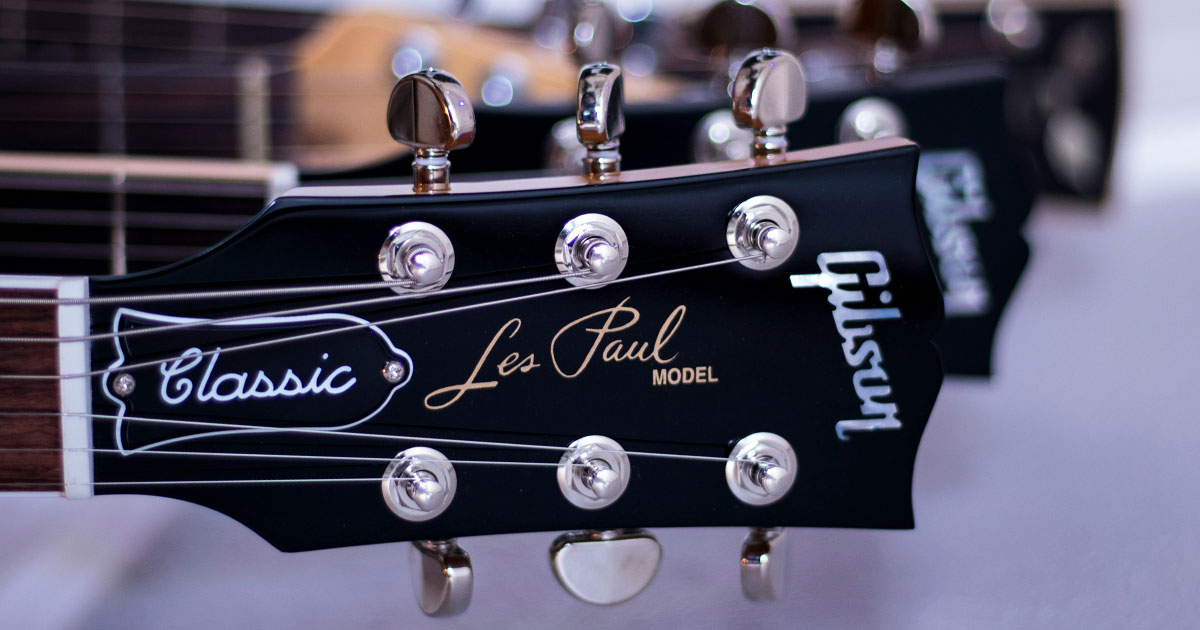
Now that you understand what tuning pegs look like, you must inspect which guitar string belongs to which tuning peg. Remember that the strings are counted from bottom to top. The first string is the thinnest, and the following strings gradually thicken. The sixth string will be the thickest if you have a six-string guitar.
What You Need for Tuning a Guitar
We've introduced the essential knowledge, and now let's move on to the things we need for tuning a guitar. Nowadays, there are many accessories available for guitars and musical instruments, but you don't need much for tuning. If you are tuning your guitar for the first time, it's helpful to follow a small checklist:
- Guitar
- Guitar tuner or smartphone
- A quiet, well-lit place where you won't be disturbed
Separately, I want to emphasize that a quiet and well-lit place plays a very important role in music and guitar lessons. The right environment, where no one will disturb you, is crucial for your development and motivation to practice music.
In the modern era, where many people have access to the internet and technology, I believe the best way to learn is through methods involving a guitar tuner. Additionally, we'll explore how to tune using the 5th fret method, also called the relative method.
Standard Tuning: Naming Each Guitar String
Before we begin to tune the guitar, we need to learn some very important information about guitar tuning. There are many different guitar tunings, but our goal today is to learn how to tune the guitar in standard tuning.
Standard tuning is:
- E - first string
- B - second string
- G - third string
- D - fourth string
- A - fifth string
- E - sixth string
It is very important to memorize the name of each string because guitarists sometimes need to check and tune their guitar after every performance. Now we can move on to the next section of our lesson.
Guitar Tuning with a Tuner: Step-by-Step Guide
Well, here we come to the magical moment of tuning the guitar. I hope you have found a quiet and cozy place and are in a good mood.
First of all, we need a tuner. You can buy a clip-on guitar tuner, a standard portable tuner, or simply download an app on your phone.

If you're using a clip-on guitar tuner, attach it to your guitar's headstock in a convenient spot.
If you’re using a standard portable tuner or a tuning app on your phone, place it on the leg near the guitar's soundhole. If you sit in the classical position, put it on your left leg. If you prefer to hold the guitar on your right leg, place it on your right leg. The main goal is to place the tuner near the soundhole to ensure it accurately captures the guitar's sound.
Important information for beginners:
Before adjusting the string, I recommend loosening it by one turn. Sometimes, the string may show a higher pitch due to temperature changes.
We have seven natural sounds: E, F, G, A, B, C, D, and then E again.
Imagine that your string is tuned a semitone higher; it will be F. If we turn the peg to the next octave of the note E, the string can break because you already adjust above the nominal pitch.
Guitar Tuning Instructions
- Turn on the Tuner: Ensure your tuner is powered on. If it's an electronic tuner, make sure it has fresh batteries or is charged.
- Set Tuner to Chromatic Mode: Set your tuner to chromatic mode. This mode detects all notes and gives you more control and precision while tuning.
- Loosen the String: Before tuning each string, loosen it slightly by turning the tuning peg one turn counterclockwise. This ensures the string is not overly tight and helps prevent breakage during tuning.
- Start with the High E String: Pluck the high E string (the thinnest string). The tuner will display the note it detects.
- Adjust the Tuning Peg While Plucking the String: While continuously plucking the string, gently turn the tuning peg. You will hear the string tighten and see the indicator on the tuner start to move. Tighten the peg (turn clockwise) to raise the pitch, and loosen it (turn counterclockwise) to lower the pitch. Aim for the tuner to display an E.
- Fine-Tune the String: When the tuner shows E, fine-tune the string until the needle or indicator on the tuner is centered, indicating that the string is in tune.
- Repeat for the B String: Move to the next string, the B string.
- Loosen it slightly by turning the peg one turn counterclockwise.
- Pluck it and adjust the tuning peg while plucking the string.
- Gently turn the peg until you hear the string tighten and the indicator on the tuner starts to move. Aim for the tuner to show B and the needle to be centered.
- Tune the G String: Follow the same process for the G string.
- Loosen it slightly, pluck it, and adjust the peg while plucking.
- Gently turn the peg until you hear the string tighten and the indicator on the tuner starts to move. Aim for the tuner to show G with the needle-centered.
- Tune the D String: Continue to the D string.
- Loosen it slightly, pluck it, and adjust the peg while plucking.
- Gently turn the peg until you hear the string tighten and the indicator on the tuner starts to move. Aim for the tuner to indicate D.
- Tune the A String: Move to the A string.
- Loosen it slightly, pluck, and adjust the peg while plucking.
- Gently turn the peg until you hear the string tighten and the indicator on the tuner starts to move. Aim for the tuner to show A with the needle centered.
- Tune the Low E String: Finally, tune the low E string (the thickest string).
- Loosen it slightly, pluck it, and adjust the peg while plucking.
- Gently turn the peg until you hear the string tighten and the indicator on the tuner starts to move. Aim for the tuner to indicate E with the needle centered.
- Double-Check Tuning: Once all strings are tuned, go through each string again to ensure they are still in tune. Sometimes tuning one string can slightly alter the others.
- Make Final Adjustments: If necessary, make small adjustments to any strings that may have gone out of tune during the tuning process.
So, congratulations! After hard work, we have reached the moment when our guitar sounds perfect, and we can enjoy every chord and melody. Now, let's move on to the next method of tuning the guitar, which is called relative tuning.
Relative Tuning Method
Relative tuning is a method where you tune your guitar strings relative to each other, without needing an external tuner. This was the first method I learned when tuning my first guitar. I remember that a friend, who already knew a couple of popular songs, showed me this method.
It is worth noting that this method was commonly used by musicians in the past as the main approach to tuning. To achieve the best results with relative tuning, you'll need a tuning fork, piano, pitch pipe, or another instrument to provide a reference pitch for your guitar strings. However, the method is still very popular for quickly checking your instrument. First, we need to find a reference pitch for one of the guitar strings.
Finding the Reference Pitch Using a Tuning Fork
- Obtain a Tuning Fork: Ensure you have a tuning fork that is tuned to A440 (440 Hz), which is the standard pitch for tuning musical instruments.
- Strike the Tuning Fork: Hold the tuning fork by its stem and strike one of the prongs against a firm object, like your knee or a table edge, to make it vibrate.
- Amplifying the Sound: Immediately place the base of the vibrating tuning fork on the body of your guitar, for example, the bottom part of the guitar bridge. This will amplify the sound of the tuning fork, making it easier to hear and compare with the harmonic you produce on the guitar string.
- Understanding and Playing Harmonics on the A String:
- The 5th string, when played openly, sounds like an A note at 110 Hz. When you play its harmonic at the 12th fret, the sound is an A note at 220 Hz, one octave higher. At the 5th fret, the harmonic's pitch goes up to an A note at 440 Hz, two octaves higher, producing the same sound as an A note at 440 Hz from a tuning fork. This corresponds to the pitch of the tuning fork, and for accuracy in tuning the guitar, I recommend using the harmonic of the A note at 440 Hz on the 5th fret. We can see that all three notes are A. If you are a beginner guitarist, using harmonics for the first time may be challenging. Therefore, you can tune the string using only the open A string.
- Lightly touch the A string (the fifth string) directly above the 5th fret. Do not press the string down; just lightly touch it.
- Pluck the A string while keeping your finger lightly touching the string above the 5th fret, then quickly remove your finger after plucking. This will produce a natural harmonic at the 5th fret.

- Match the Pitch:
- Compare the pitch of the harmonic on the A string to the sound of the tuning fork.
- Adjust the tuning peg of the A string while continuously plucking the harmonic until its pitch matches the pitch produced by the tuning fork. Aim for them to sound the same (in unison).
- Fine-Tune the Pitch:
- Make small adjustments to the tuning peg until the sound of the harmonic on the A string matches exactly with the sound of the tuning fork (in unison). You can also double-check by comparing the sound of the tuning fork with that of an open A string, as they both produce the A note, albeit two octaves apart.
- The beats (wavering sound) between the two pitches should disappear, indicating they are in tune.
Using the 5th fret harmonic can be a precise method for tuning your guitar to the reference pitch provided by a tuning fork. Once the A string is in tune, you can proceed with tuning the rest of the strings using the relative tuning method.
Tuning the Guitar by Ear Using the Relative Method
- Start with a Reference String: Choose one string to serve as your reference pitch. This string should ideally be in tune. We're going to start with the A string (5th string) since we've already tuned it with a tuning fork.
- Compare with Adjacent Strings:
- Low E String (6th String):
- Depress your finger on the low E string at the 5th fret and pluck it. This note should match the pitch of the open A string.
- Adjust the tuning peg of the low E string until both notes sound the same.

- D String (4th String):
- Depress your finger on the A string at the 5th fret and pluck it. This note should match the pitch of the open D string.
- Adjust the tuning peg of the D string until both notes sound the same.

- G String (3rd String):
- Depress your finger on the D string at the 5th fret and pluck it. This note should match the pitch of the open G string.
- Adjust the tuning peg of the G string until both notes sound the same.

- B String (2nd String):
- Depress your finger on the G string at the 4th fret and pluck it. This note should match the pitch of the open B string.
- Adjust the tuning peg of the B string until both notes sound the same.

- High E String (1st String):
- Depress your finger on the B string at the 5th fret and pluck it. This note should match the pitch of the open high E string.
- Adjust the tuning peg of the high E string until both notes sound the same.

- Low E String (6th String):
- Double-Check and Fine-Tune:
- After tuning each string, go through them again to ensure they are still in tune relative to each other. Sometimes tuning one string can affect the tuning of others.
- Make small adjustments as needed to fine-tune each string until they all sound harmonious together. The picture or scheme below will help you memorize the relative sounds on the fretboard.

By following these steps, you can tune your guitar using the relative method, which relies on comparing the pitch of one string to another to achieve accurate tuning. This method is particularly useful when you don't have access to a tuner.
How often should you tune the guitar?
How often you should tune your guitar depends on various factors such as how frequently you play, the climate, and the quality of your guitar's tuning pegs. In general, it's a good idea to tune your guitar every time you pick it up to play, especially if it's been sitting for a while or if you're playing in different environments with varying temperatures and humidity levels.
Changes in temperature and humidity can cause the wood of the guitar to expand or contract, affecting the tension of the strings and consequently the tuning. Additionally, the act of playing can also cause the strings to stretch and go out of tune. Therefore, it's recommended to tune your guitar before each practice session or performance to ensure that it sounds its best.
Time to Summarize
In today's world, we have access to vast technological opportunities that make our daily lives easier. I strongly recommend utilizing them because they save time. However, if you have the time and desire, you can also enhance your skills by learning how to tune the guitar by ear.
The method of tuning the guitar by ear that I have described is not the only one; there are many different methods available. For example, we can use the first string as a reference and then proceed to tune the guitar using the relative method, starting from the first string. Another method involves tuning the guitar using natural harmonics. If you grasp the principles of tuning the guitar, I will be happy to know that my work has helped someone who loves the guitar and guitar music.
Wishing you harmony and happiness,
Serge